I believe people should practice what they preach.
Whether it’s regarding diet, love, business or simply moral code – it’s hard to take a person seriously if they don’t actively do the things they advise others to do. I want to make sure it’s easy to take us Ninjas seriously…
For the last year I’ve been recommending that agents get active with video marketing. Problem is, we didn’t publish a single new video last year. Obviously RealtyNinja is not a real estate agent or brokerage, and our marketing strategies differ from your own.
That doesn’t mean we couldn’t learn and grow through video marketing. In fact, the best software companies in the world actively use video to engage their current and potential customers.
So this year we made a professional resolution to make more marketing videos. We stopped trying to learn about it, and we just dove in head first. To quote our co-founder Casimir, “If you’re gonna get wet, you might as well go swimming.”
Our first attempt at video (photo above) turned out to be a bit too relaxed. The end result was a video that wasn’t quite up to the awesome standards we expect from ourselves. We decided that our first video shoot would simply be a test run. If Ninjas were going to get into video marketing, we would do it right… with the right tools and professional inclinations.
Here’s how Ramin and I went from being designers and marketers to becoming overnight videographers. I want to show you how relatively easy and affordable it was for us to get set up with professional equipment, and create our first piece. Hopefully reading our experience will give you the confidence you need to get out there yourself and start creating!
At the very end, we’ll show you the final video we ended up creating!
The Tools of the Trade
Some DSLR Cameras Are Made For Video
By no means do you need to spend a fortune on a DSLR camera. The camera will definitely be the biggest chunk of money you invest in video marketing, but it doesn’t need to cost you more than a grand.
We were fortunate, because our co-founder Ramin was in the market for a personal DSLR camera. He decided to combine his personal and professional inclinations to find a camera that creates incredible HD/4K video, but also takes awesome photos on the fly.
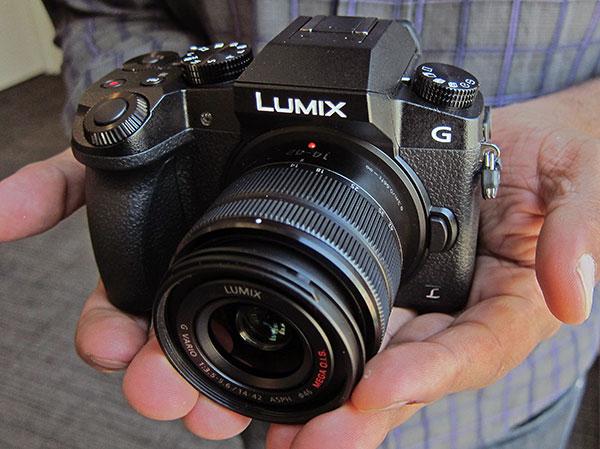
After hours of meticulous research, Ramin found the camera that was perfect in every way – including price: The Panasonic LUMIX G7. This camera is a YouTuber’s dream come true. It captures insanely high quality 4K video and can even create awesome timelapse videos. Got a shaky hand? It can auto stabilize your footage (but you should be using a tripod anyways.)
The cost? $899.00
Proper Video Lighting is a Must
No great video was ever made without proper lighting. I didn’t want our 2017 resolution to be “create mediocre videos,” so we opted to start looking at lighting kits online. Our first thought was to check Amazon, but then we found an awesome deal from canadianstudio.ca on an entire light kit, which included:

- Three (3) 6’x9′ Heavy duty backdrops (black, white, & green screen)
- One (1) 7’x10′ backdrop stand kit (with carrying case)
- Two (2) 7 foot light stands (fully adjustable)
- Two (2) 33″ reflective umbrellas (black/silver)
- Two (2) 33″ translucent umbrellas (white)
- Two (2) Professional fluorescent Light bulbs (200W)
- Two (2) mountable light sockets (with on/off switch)
All of this was shipped THE NEXT DAY to my apartment in North Vancouver, BC. That probably has something to do with the fact that this company is located in Richmond, BC – so your shipping experience may vary – but if you happen to be close to Richmond like me, it’s a nifty bonus.
Oh and the cost? A whopping $169.00.
Nothing Grabs Attention Like Crisp Audio
We ended up filming our first video using the built-in microphone on Ramin’s LUMIX G7 camera.
This is generally a no-no as far as creating great video goes. Microphones should always be used to maximize the quality of and engagement with your videos. Unfortunately, the microphone we had ordered hadn’t arrived yet.
The show must go on…
The built-in microphone on the LUMIX G7 camera did a great job. We’ll be using a proper microphone from now on, but I can confidently say that the LUMIX G7 will make sure you sound good au natural.

The microphone we ended up purchasing is the RODE VideoMic GO. Its surprisingly lightweight and mounts directly onto the camera. We haven’t recorded anything with it yet, so I can’t tell you how awesome it is (for now) but I’ll keep you posted. I can pretty much guarantee the audio quality will be an improvement over the built-in microphone.
The RODE mic cost us $119.00.
You Can’t Make a Video Without a Tripod
Both Ramin and I had our own Tripods, so we didn’t really have to research or purchase anything new in that regard. If you don’t have a tripod, I highly recommend one. Watching a shaky hand-held video is extremely annoying, even with stabilization.
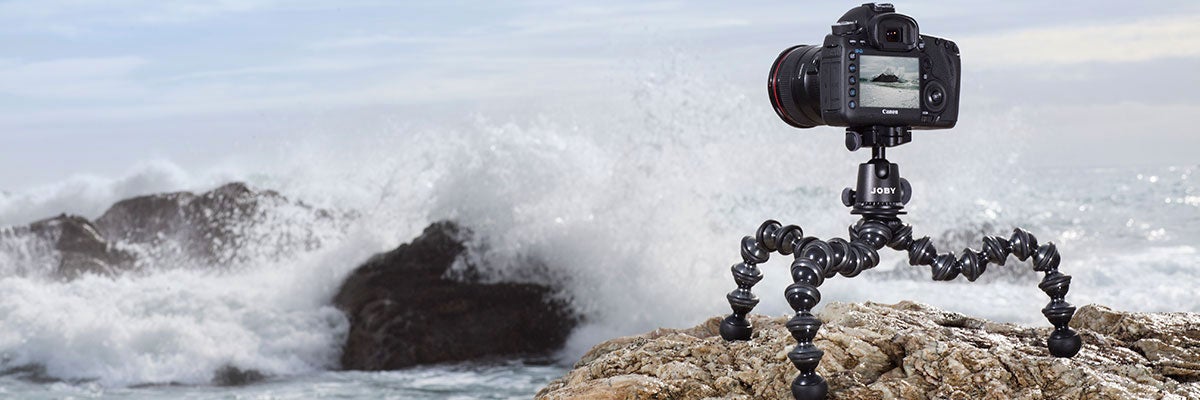
Apart from our regular tripods, we also had a GorillaPod Tripod handy. Super neat and useful for balancing your camera on uneven or otherwise tricky surfaces. It can also wrap around posts and poles, making for extremely unique shots!
The GorillaPod SLR Zoom Tripod costs $49.00
Filming Day At Sepy’s Place
Setting Everything Up
Ramin arrived at my apartment at 10 am last Friday, and I had already begun setting up the lighting kit and backdrops.
Setting up the lights, umbrellas, backdrop stands and hanging the black backdrop took about 20 minutes. I’ve got prior experience with this sort of equipment, so your timing may vary. First time setups could take as long as an hour, but shouldn’t take you much longer – it’s basically all just twisting knobs and adjusting pole lengths.
We had to steam the backdrop, as it had crisp fold lines all over it like gridmarks. The backdrop needs to be smooth – ideally use a steamer (I found a hand-held travel steamer at Bed, Bath & Beyond for $25), but you can get away with ironing it normally. Although that’s definitely more time consuming than steaming.
I had to move half of my couch around to make room in front of my sliding balcony doors for the backdrop. This posed a bit of a problem… the morning light was passing through the balcony door, through the blinds & drapes, and through the black backdrop. There was so much natural light saturating the room, you could see the blinds through the back drop – no good!

In classic Ninja fashion, we improvised to solve the problem quickly. Black garbage bags reflect 100% of light. I cut open 4 large garbage bags at the seams, taped them together with duct tape, and draped it over the balcony door.
All of a sudden, all the natural light disappeared from the room and the black backdrop looked black again. Just for good measure, we also hung the white backdrop up BEHIND the black one. That gave us an extra layer of light protection.
Now that we’d made space for the shoot, dealt with the exterior light, setup the lighting and backdrop stands, and steamed the backdrop it was time to plug in the lights and test out the camera.
Lights, Camera…
Ramin threw a charged battery and empty memory card into the G7 and screwed the unit onto a tripod. We spent the next 15 or so minutes playing with a variety of different variables.
First we had to find the perfect spot for the tripod, so that the black backdrop was centered in the frame and so both Ramin and I could fit into the frame without being too cutout (Ramin is really tall.)
Ramin would watch the camera and guide me to move left or right, then I’d mark the ground where my feet were with duct tape.

Next was a matter of the lighting. We were working with two types of umbrellas. One which is translucent white (produces a more soft light,) and one which is reflective black & silver (produces a harder light.)
We tested both umbrellas, but we also tested different angles and distances. Moving the light stands back had a different effect than if they were closer, especially with the reflective lights. Turning the light stands slightly also had various effects on shadows and such.
Ideally, you should try and eliminate shadows in your video entirely. Properly setting up your lighting can be very challenging depending on the nature of your video, and may end up being the most time consuming part of your day.
Testing The Script, Footage & Audio
Once we’d set up all the equipment and lighting, marked our feet and positioned the tripod & camera perfectly, we were ready to start memorizing our lines.
We had written a script that outlined everything we wanted to say. Small changes in wording that would inevitably happen on-the-fly were totally acceptable, but we weren’t about to improvise our video marketing.
We hit record on the G7, stood on our duct tape marks, and read through our lines on camera about 10 times with the help of a laptop open to our script.

We popped the memory card out of the camera, stuck it in a Macbook and loaded up our test footage. Audio sounded surprisingly crisp, but we caught a couple of wrinkles in the backdrop. We quickly steamed those out, and used a couple of clamps to make the backdrop even more taught – virtually eliminating any potential wrinkles.
We made a couple more adjustments, tested the footage again, and we were off to the races.
… Action!
When we were ready to start filming, it was already 1:30 pm. Mind you, we were also responding to work emails and taking calls here and there throughout the day. It may take you less than 3.5 hours to set everything up for your shoot – hopefully it does. Without all the distractions, I’d say we could have shaved at least an hour off of our time.
When filming, we wouldn’t allow for more than 2 takes per clip. In other words, every time we screwed up, Ramin would go stop the recording and then start it again. This creates a new file on your camera, rather than simply filming one extended clip.

With that said, I still prefer stopping after every out take – it makes for a cleaner experience when you’re editing the videos afterwards.
We ended up filming until about 4:30 pm – I think we had a total of about 35 or 40 clips in the camera before we decided it was a WRAP! To give you some context, we filmed for 3 hours, and ended up with 3 minutes of finished video content.
Post-Production & Publishing
At 4:30 we sat down on Ramin’s Macbook, plugged in the memory card from the camera and downloaded all the files from his card to his laptop.
This is when the fun begins… we used Final Cut Pro for editing the final video, you could also use Adobe Premiere or iMovie which is much more simplified.
Our video was one continuous clip, so editing was quite easy. We simply cut the “fat” from the beginning and end of the video, then added our logo to the end, as well as a neat Ninja Smoke Bomb animation. We also added a low volume mp3 track to the video, and tweaked the contrast a little to make us pop out more against the backdrop.
Nothing too drastic, editing ended up taking us only 30 minutes! Your video may consist of more clips, it could be longer or more complex. In which case, editing could be a much larger part of your process.

We also made a blooper reel from the 30-odd clips we didn’t end up using. The bloopers got uploaded to Facebook and Instagram as well as YouTube as a fun and engaging piece of content.
So far the blooper reel has reached over 3,000 people in a week, organically – aka we haven’t spent a dollar on boosting it with ads (yet.)
The actual video we created was to promote our upcoming “Intro To RealtyNinja” webinar series which is beginning next week. The video will be embedded into a landing page that encourages visitors to sign up for the webinar. That video will be receiving thousands of views over the course of the year.
This was RealtyNinja’s first attempt at Video Marketing, but now we’ve got all the tools and know-how to create awesome video content on a regular basis. All it took was about 7 hours of two peoples’ time and $1,300 in financial investment.
We already earned almost double that number in terms of reach from the blooper reel of our first video… imagine how far that $1,300 is going to go for us over the course of 2017!?!??!
You can watch the final edit of the Intro To RealtyNinja Webinar Invitation video we created, as well as the blooper reel embedded below! Let us know what you thought of them in the comments below!
Intro To RealtyNinja Webinar Invitation Video
Webinar BLOOPER Reel!
[-_-]~~~ Ninja Tip: Don’t have $1,300 to spend on a camera and gear? Use your smartphone to create content on the fly. Remember, content is better than no content… 1 > 0.